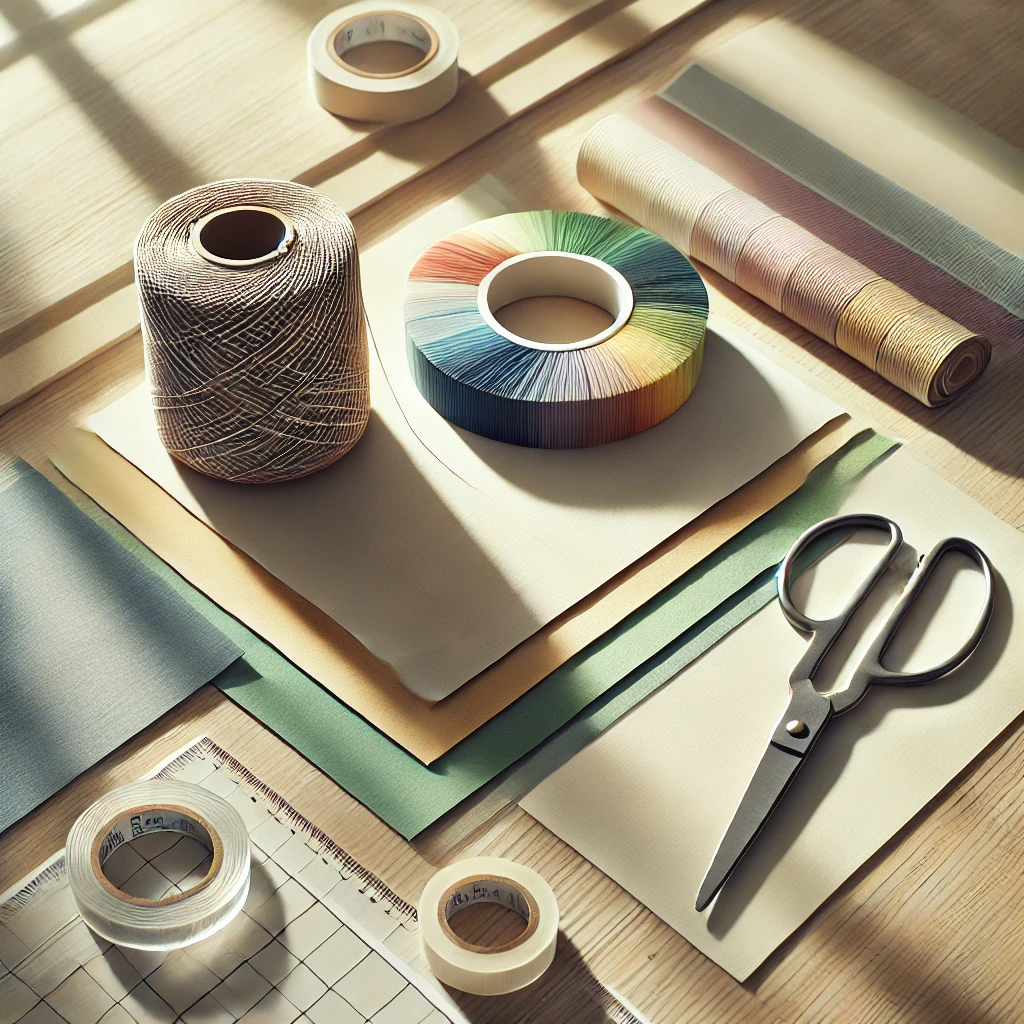
String, paper, tape, and scissors—if you have these four materials, you’ll never be bored. Here are two easy crafts that you can make with them!
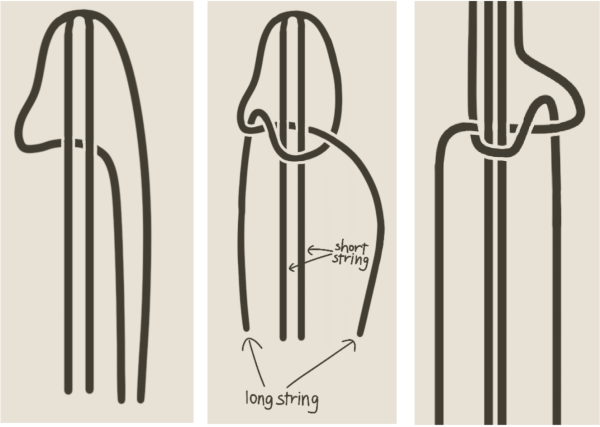
Figure 1
Macrame Bracelets are great small crafts to take up time when you want to fidget with something. Ranging from easy designs that can be continued without patterns to difficult ones that can spell out words and include designs in colored string, these bracelets have options for everyone! Two popular and beginner-friendly bracelets are the square knot bracelet and the heart bracelet. Here’s how to make a square knot bracelet:
- Cut two strings for the bracelet. One should be approximately 3 times the circumference of your wrist, and the other should be around 3 times the length of the first.
- Find the midpoints of each string and tape them down onto the table. Now, collect the ends of the strings; there should be 4, and the two on the outside should be the longer strings.
- Make a c-shape with the leftmost string, which should be a long string. Pull the bottom part of the string under the two shorter middle strings, as in Figure 1.
- Then, pull the other side of the string in a c-shape under the two shorter middle strings and through the loop formed in step 3 by the leftmost string, as in Figure 2.
- Pull the ends of the two long strings to tighten the bracelet.
- Repeat step 3 with the rightmost string instead of the leftmost string.
- Repeat step 4 with the leftmost string instead of the rightmost string. Refer to Figure 3.
- Keep repeating steps 3 – 7 until you run out of string!
- Tie an overhand knot at the end to finish your bracelet.
Finger Claws are the perfect edition to scare your mom and annoy your classmates (and possibly your teachers as well)! These long, pointy, talon-like paper claws will have your peers astonished by your goblin-looking hands. So why not make some paper claws to go with the free time you have on your hands? (Get it? Hands? Ok anyways…)
Take a piece of A4 paper (this can be found in your printer) and fold it diagonally to form a triangle, but make sure to leave a rectangle at the bottom. Make sure this paper isn’t creased, or else your claw will be flimsy.
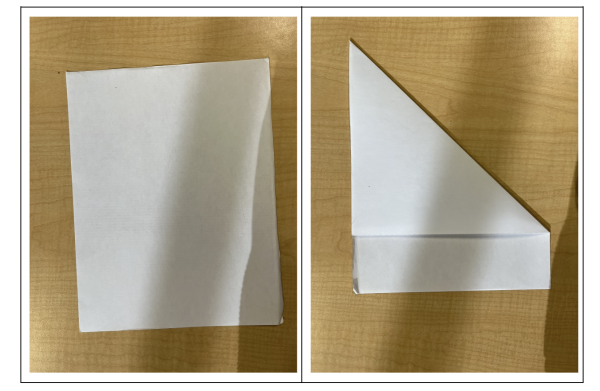
Then, fold the top right corner and fold it down to meet the left end of the triangle.
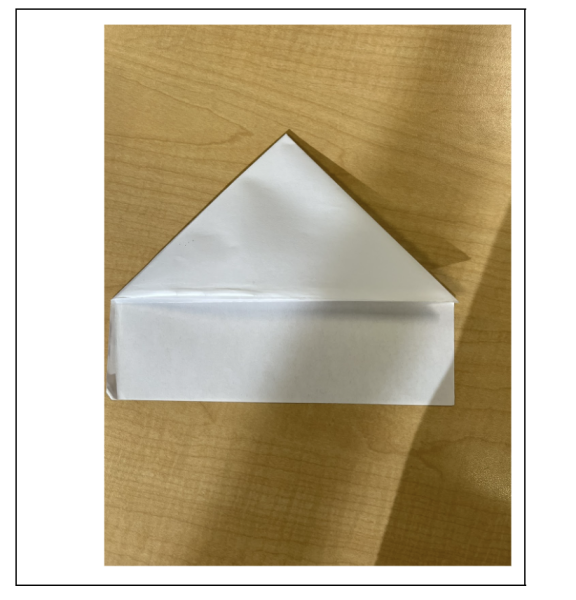
Take the two corner edges of the rectangle part of the paper and fold it inwards.
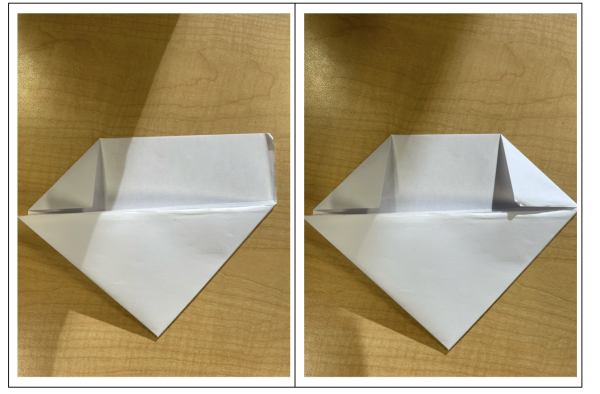
Fold the bottom part of the paper upwards (the part that used to be a rectangle until you folded the corners in).
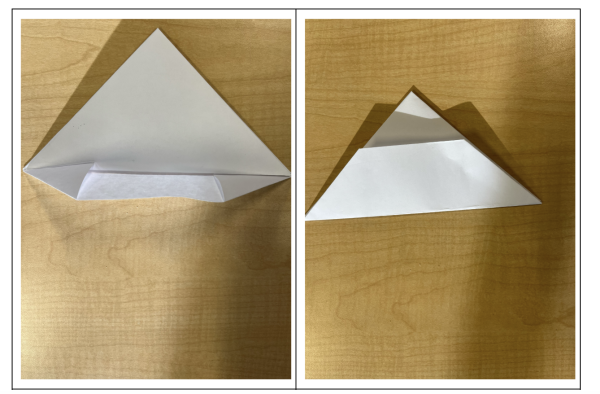
Next, take the right side of the triangle and fold that half inwards. Make sure to press the creases in with force!
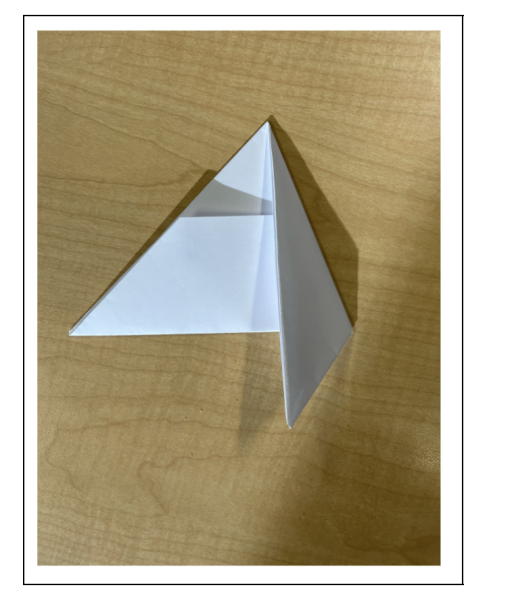
Fold the right side inwards again. If your craw starts to unravel slightly, feel free to crease it further.
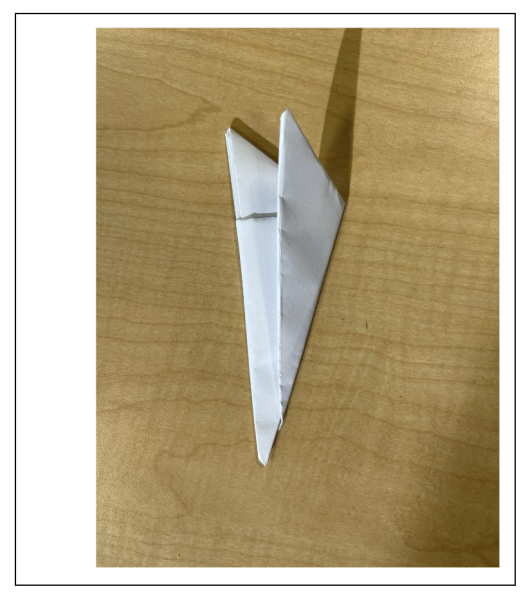
Now here comes the hard part, take the bottom point and tuck it into the fold that was made by the previous creases.
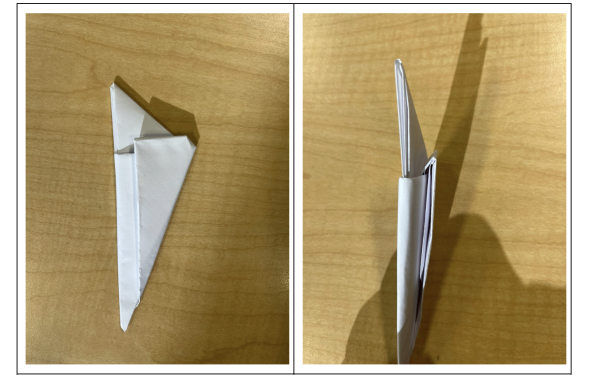
Now… put it on!! Congratulations, you have now made a statement piece to any outfit, no matter the occasion: a possible Halloween prop, an extension of your finger to reach the TV remote to press “here” when Netflix asks if you’re still there, and a self-defense mechanism!
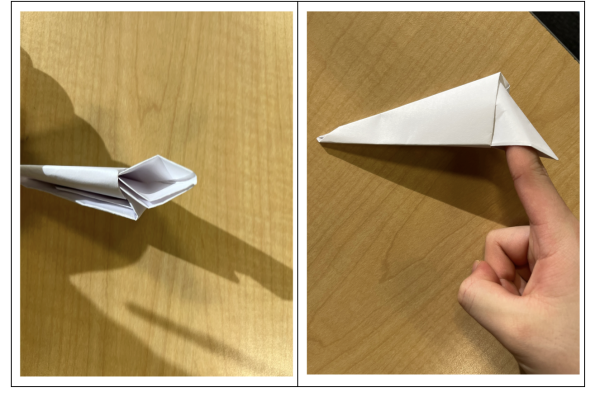
And that’s a wrap! Join us next time to see what other devious crafts you can make to pass the time in a creative manner.
Procrastination Duo, out! (mic drop)




![Teacher [Milk] Tea: Part 2](https://bisvquill.com/wp-content/uploads/2024/03/Screen-Shot-2024-03-19-at-9.28.48-PM.png)
